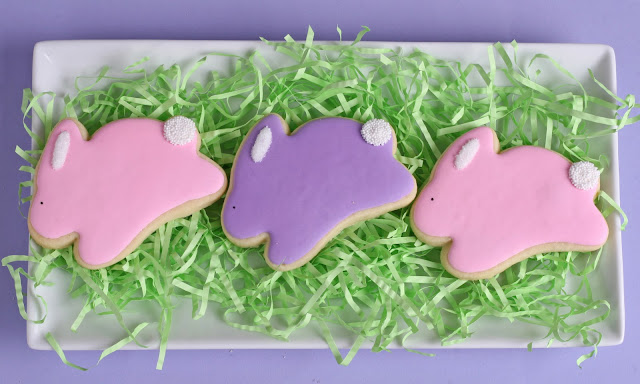
Here in California spring is finally making an appearance, although I know in much of the country it may be a few weeks yet! I hope this pretty pastel set of Easter cookies will give you hope of the beautiful spring season to come!
I created this set of simple, styled shapes that would be perfect for even beginning cookie decorators to attempt.
My sugar cookie recipe is posted HERE.
The royal icing recipe is use (as well as lots of decorating tips) is posted HERE.
Now let's get to decorating!
Of course there had to be bunnies...
~Make the bunny~
1. Outline and flood the bunny shape. Allow to dry (6-8 hours).
2. Pipe thick white icing on the tail and sprinkle with white non-pareils (tiny white ball sprinkles). Pipe some thick white icing in the center of the ear and sprinkle with white sanding sugar. Add a black dot for an eye with an edible marker.
And then we need some cute chicks...
*This cute chick design was directly inspired by the talented Hello Naomi (and recreated with permission)
~Make the Chick~
1. Outline an egg shaped cookie.
2. Flood with thinned icing and allow to dry completely (about 6-8 hours).
3. Pipe thick yellow icing in a half circle shape on either side of the chick, as wings. Sprinkle with pale yellow sanding sugar. Add a beak with thick orange icing (using a #1 or #2 sized tip). Add eyes using a black edible marker.
And let's not forget a few woolly sheep...
~Make a sheep~
1. Outline the cookie.
2. Flood with thinned icing and allow to dry completely (about 6-8 hours).
3. Use thick white icing to outline the sheep (leaving space for the face), and then use the icing to make some scalloped lines across the sheep's body. Immediately sprinkle with white non-pareils (tiny white ball sprinkles). Use a black edible marker to add a face and feet. Pipe a tiny white dot for an eye.
Happy Cookie Decorating!
- Follow RecipesDream
- Follow @us


