Loading
Showing posts with label Vitamix. Show all posts

Delicious Low Carb Recipe - Flourless Dark Chocolate Espresso Cake

Gluten Free Dairy Free Healthy Chocolate Cake

This absolutely divine chocolate cake is a birthday gift for Mom and David. Happy birthday guys!! This recipe comes from my somewhat-recent obsession with low carb chocolate desserts and from Karina's Flourless Chocolate Cake recipe. Thank you Goddess! I am really excited to try this ... if there is any left after the birthday folks devour their share :) Karina, I hope you are doing better. I know you can't have this recipe with the eggs and probably not even the vegan butter (?) :(

Since I was always one of those kids who failed the basic "read and follow directions" quizzes, I decided to alter Karina's basic recipe to be lower carb. I omitted the organic cane sugar entirely and substituted Stevia, unsweetened pineapple juice, a tad of organic brown sugar for texture, and cinnamon instead. I'll tell you that the batter is fantastic, so I think it will be sweet enough.* I also decided to lump in extra espresso grinds as I blended the batter since fresh espresso grinds can't possibly make it worse. Can't possibly, no way jose.

*This cake is absolutely delicious - it has a rich, fudge-like consistency and deep dark chocolate taste. I will definitely be making this again - possibly for our wedding.

Chocolate Espresso Heaven by the Slice
1 12 oz bag Sunspire unsweetened dark chocolate chips (or your favorite dark chocolate bar)*
1/4 c. hot fresh espresso **
~1 T. fresh espresso grinds (optional, but man its good)
1 T. organic vanilla***
1 T. cinnamon
4 heaping T of unsweetened baking cocoa powder
1/4 c. (powdered) Stevia
1 T. organic brown sugar
1/4 c. unsweetened pineapple juice
6 free range organic eggs, room temperature
2 sticks Earth Balance Vegan light butter, room temperature (I know that's a lot, but it makes the consistency for a flourless cake. See the bottom for a butterless variation.

My first remark is that I used the Vita-Mix for the whole grinding and mixing process. You can use a food processor or your blender if you prefer. The Vitamix made the preparation very fast and fun. I love to watch it go!

Preheat the oven to 350 degrees and coat either two cake pans or preferably a large springform pan with nonstick spray. First, add the Stevia, brown sugar, cinnamon, espresso grinds, and chocolate chips to the Vitamix. I did this as I made my second double shot of espresso so I just so happened to have extra grinds to add. It is not as if I used the cake as an excuse to make more espresso, nor as if I used the espresso as an excuse to make the cake - nope. In fact, if you believe that, I have a bridge in Brooklyn to sell .. call me. Anyway, grind the chips and dry ingredients up for about 10-15 seconds as shown below. I did this for a very sort time since I wanted to preserve a few whole chips for the cake.

Vita-Mix chocolate cake recipe
grinding the chocolate chips

Add the pineapple juice and hot espresso. Blend for ~5 seconds until creamy. Add the cocoa powder, vanilla, eggs, and vegan butter. You may wish to scrape off the sides with a spatula before you start blending again to make sure no dry powder is stuck. I just cracked the eggs and poured everything right into the Vitamix as shown below, but if you're not using the Vitamix, beware. The Vitamix has a very large container ( ~8 c.) which makes it perfect for batters like this, smoothies, and soups. However, your blender or food processor may not be this large so be careful not to overflow it.

Vita-Mix fudge recipe
all batter in the Vitamix, ready to rock n' roll

Replace the lid and mix on variable medium-high for about 30 to 45 seconds until smooth. Again, you may need to use the spatula (or the Vitamix damper) to scrape the sides as you go.

Pour the batter into the greased springform or two cake pans. I made the mistake of only using 1 cake pan and it almost overflowed. We had some tense moments baking, having to quickly slide a cookie sheet under the cake pan to prepare for an overflow. After all, it didn't overflow - thank goodness! If it had, I probably would have been a moron and tried to lick the bottom of the oven after it cooled since it smelled so good :)

Bake at 350 degrees for 45-55 minutes (for 1 cake pan). You will need to shorten the time for 2 pans - I estimate about 30 minutes or so. Bake until the middle is set and a toothpick comes out clean. Remove from the oven and set aside to completely cool - hands off (that's a reminder for me). Once cooled, cover and refrigerate it for at least 3 hours or longer so it is nice and firm, thick, and deliciously lip-smacking chewy (think fudge texture but better). My cake edges fell a little but it isn't a problem. Karina recommends pressing the cake gently with the spatula to even out the surface after cooling, but I am too lazy for that so, as I like to say, to each his his/her own. Serve cooled with obnoxious birthday hats :) The hats are optional. I wonder if Burger King still gives out paper crowns for birthday kids?

Gluten Free Dairy Free Healthy Chocolate Brownies
GF DF Chocolate Cake

No butter flourless dark chocolate espresso cake:
The butter recipe is the exact same, minus the butter. I made a tiny single serving of the batter without the vegan butter as an experiment. It baked for about 12 minutes. Omitting the butter does change the consistency by a fair amount. This variation is sticky and reminiscent of very moist fudge, but still tastes phenomenal. I think both recipes make delicious desserts and I am going to make both again.
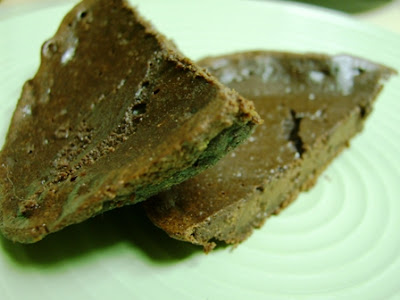
Gluten Free Slice of Chocolate Fudge Cake
No butter GF DF chocolate cake

Rants/ Sidenotes:
* These are gluten and dairy free, but always read the ingredients anyways

** I used freshly ground Newman's Own French Roast beans. They are organic, free trade and shade grown (and on sale at Harris Teeter, yay!)

*** Watch for sales on the fancy organic spices and extracts. We found this organic fair trade vanilla on sale and with a coupon at our local co-op. Getting fair trade spices, herbs, and extracts is important if you can manage it. Supporting the local farmers is vital since usually large haciendas or companies take over the market and either under pay and overwork, or put the locals out of business. Also, the quality of more local fair trade products is better in my experience. Judge for yourself, but just so you know. I might do a post on fair trade issues later.

Follow RecipesDream

Kimchi (Napa Cabbage and Bok Choy) and Fermented Radish & Kale [Paleo][Low Carb]

Kimchi is a traditional Korean dish of spicy fermented cabbage. Napa cabbage, usually. An excellent example of the power of the wisdom in traditional diets, kimchi combines the "superfood" elements of cabbage with those of onion and cayenne. As I have mentioned previously,

Cabbage:
  • protects against a wide spectrum of cancers
  • is a great source of glutamine
  • is healing to the digestive system
  • has a mild cholesterol lowering effect*
  • provides antioxidants
  • is a good source of vitamins A, C and K, and anti-inflammatory polyphenols.
The George Mateljan Foundation has an in-depth summary of the health benefits of cabbage and kale. A particular cabbage glucosinolate, sinigrin, has been the focus of anticancer research. In addition,

Kimchi:
  • provides additional detoxification benefits due to the high sulfur content of onions and garlic
  • boosts metabolism (cayenne)
  • provides more vitamin A and C (cayenne)
  • helps lower cholesterol* (cayenne)
Fermented foods like kimchi are a great source of "good" gut bacteria. When made properly with salt or whey (lactofermentation), kimchi and sauerkraut provide an especially important and less common bacterial strain, L. Plantarum. It is one of the few flora strains which sticks to the intestinal wall rather than being processed out by the body like other strains of "good" bacteria. Lactic acid produced in traditional fermentation is one of the most valuable organic acids since it can be used in the body more immediately than other important fermentation by-products like acetic acid.

My kimchi is based on Dr. Ben Kim's recipe. Dr. Ben Kim, from whom I adapted this basic recipe, focuses on the use of Napa cabbage and gives a great pictorial step by step method of traditional kimchi. As anyone who knows me can vouch, however, I cannot follow a simple recipe and have thus fermented a few other varieties of my own "kimchi" using kale and bok choy. Who can pass up such vibrant vegetables in the produce section? Certainly not me, though it would be better if they were growing out of my garden...


Ingredients for the Napa Cabbage Kim Chi: (substitute Bok Choy for Napa cabbage below for the Bok Choy version)
  • 1 large Napa cabbage
  • 1 bunch fresh scallions
  • onion, yellow chopped
  • garlic, minced. I used about 5 cloves
  • 1-2 T. salt (use the second T. salt if not using whey)
  • 1 T. cayenne powder
  • ~1/4" chunk fresh ginger root
  • 1 organic green apple (to puree) or applesauce, unsweetened
  • optional: 2-3 T. sea vegetable flakes

Ingredients for the Fermented Kale and Radish 'Kim Chi':
  • 1 large crisp bunch kale
  • ~ 5 radish
  • onion, yellow chopped
  • garlic, minced. I used about 5 cloves
  • 1-2 T. salt (use the second T. salt if not using whey)
  • 1 T. cayenne powder
  • ~1/4" chunk fresh ginger root
  • organic green apple (to puree) or applesauce, unsweetened
Procedure:
  1. Chop up the Napa cabbage, bok choy, and kale into bite sized pieces. Place in separate bowls. Note: Dr. Kim states that the brassicas shrink about a quarter in fermentation so the end product will have smaller pieces than it initially seems.

    Chopped raw Napa cabbage (L), kale (C), and bok choy (R)

  2. Thinly slice 4 oz. of the radish and either chop or slice the onion. Measure out or pinch desired amount of kelp or other sea vegetable. Set aside.
  3. Measure out 1/4 c. sea salt.* I used Celtic sea salt but really all you need is a basic pure salt and preferably without fillers which will cloud the final fermented product. The Celtic sea salt is a great source of trace minerals and is unrefined. It is not processed with chemicals or at high heat which can damage the healing properties of the salt as many commercial salts are. This brand in particular is "doctor recommended" if that is important to you. *Note: Salt such as Celtic sea salt or table salt with with iodine will slow fermentation. Use pickling salt (iodine free canning salt) if you would like a shorter 2-4 day room temperature fermentation. (Thanks Ima for clarifying that!)
  4. Dissolve the sea salt into warm water and then add the brine to the cabbage batches. Mix the brine and cabbages. I wore gloves so the salt wouldn't sting however the salt is very healing for the skin and will naturally exfoliate and gently detoxify the skin with its astringent quality.

    Salting the cabbage

  5. Cover the salted cabbage batches and let sit at room temperature for about four hours. If it is significantly cooler in your kitchen then you can let it sit a bit longer.
  6. After 4 hours, rinse squeeze dry.

    After 4 hours of salting: Napa cabbage, Kale, and Bok Choy. Rinse well and squeeze dry (far right)

  7. Measure out 1/4 c. cayenne powder or red chili flakes/powder. Mix with warm water to make a paste.

    Make the cayenne paste

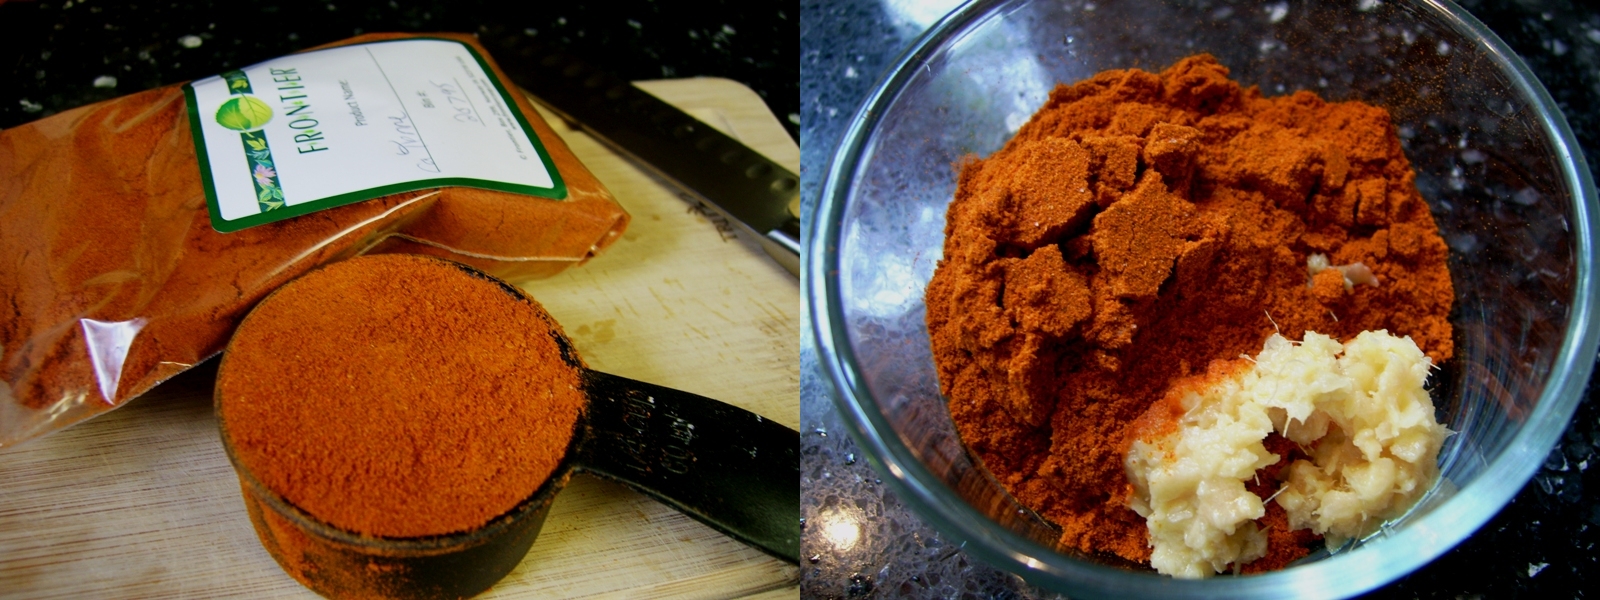
  8. Mince and/or sliver fresh garlic and ginger. Measure out your T. garlic and ginger (I used a hefty scoop of organic bottled ginger and slivered some of my garlic and minced the rest in the Vitamix later).
  9. Slice the green onions. I do so at an angle for visual appeal.

    Prep the ginger and scallions.

  10. Puree a few Vitamin C tablets (not necessary but they keep the mix from browning. Lemon juice could also be used I suppose), the cored organic granny smith apples, about 2/3 of the onion, and the remaining 4 oz. of radishes in the Vitamix with 1/2 c. water to make a natural sugar substitute for the cabbage to use as food for fermentation. Note: Dr. Kim's recipe uses apple, pear, and onion but I didn't have pears plus I wanted to add radish and my own twists (read: I can't follow a recipe to save my life, ha!). This puree is the replacement for white sugar, the fermentation food in commercial kim chi and fermented vegetable varieties.

    Slice the radish and onion. Puree the apples, remaining radish, garlic (if not minced), and onion with water and Vitamin C for fermentation sugar base.

  11. Add the kelp (sea veggie)*, sliced scallions, onion, cayenne/ginger/garlic paste to the kimchi base (the rinsed brined cabbage). Add about 1/3 of the apple puree, the green onions, and the red chili paste and ginger to each of the cabbage batches. You will have to make a full red chili paste batch as in step 7 for each cabbage batch (one for Nappa, one for bok choy, and another batch for the kale). *Again note that the high mineral (iodine) content of the sea vegetable will slow fermentation a bit.
  12. Mix well with gloves.
  13. Using a wide mouth funnel (such as a canning funnel made for Mason jars), spoon the kimchi into sanitized glass jars. Leave some head space (a little room) at the top for expansion as the brined mixture ferments. Leave the jars out at room temperature for at least 24 hours before refrigerating. I actually leave my fermented vegetables out longer than this personally, but for spoilage sake I would recommend 24 hours if you are inexperienced. Otherwise if you are wise in the ways of the age old tradition of fermentation use your best judgement.
  14. Enjoy it! The refrigeration process slows the fermentation, though the batch will slowly continue to cure and become more sour with time.

Kelp and Sea vegetables are high in healing polysaccharides (long chain sugars) and nutritious whole foods.

Kelp and Sea vegetable benefits include:

  • thyroid support through bioavailable trace minerals (most notably iron and iodine)
  • high antioxidants
  • natural cholesterol lowering effects*
  • vandium, an essential component in nutritional support for diabetics/pre-diabetics which helps to regulate blood sugar
  • fucoidan polysaccharides. Anti-inflammatory, antivirual, and high in sulfur like the raw garlic and onions added to the kimchi. David Wolfe's new video on polysaccharides discusses how certain polysaccharides protect against strains of the herpes virus.
*Much research supports the fact that low cholesterol is not a preventative measure for heart disease. For women, the higher the cholesterol the better since the cholesterol-hormone interaction and blood sugar versus fat is more prominent in women (especially post menopausal women) than men. The Weston Price foundation has many research articles on the benefits of high cholesterol including how high cholesterol increases longevity.

Though kimchi is a delicious superfood, don't overdo it on cruciferous vegetables (cabbages, kale, collards, broccoli, etc) since they can slow the thyroid if overeaten. Raw and fermented cabbage contains goitrogens which block thyroid hormone production. The natural iodine and minerals in the sea salt and sea vegetable will help to balance the goitrogen effects, however fermentation actually activates the goitrogens. The Weston Price foundation says the following on fermentation and the "dangers" of goitrogens in crucifers:
Fermentation of sauerkraut actually activates the goitrogens from their precursors. It also has the beneficial effect of reducing the nitrile content to half of what would be generated by cabbage upon digestion. Since nitriles appear to be more toxic than goitrogens and their effects cannot be mitigated by dietary iodine, the overall effect of fermentation is positive. More importantly, if sauerkraut is used as a condiment, the amount of goitrogens consumed is very low and very unlikely to exert any harm. However, it is important to realize that unreasonably high intakes of sauerkraut could have adverse effects.
'Nuff said. Now feast your eyes and then ferment up some veggies to feed your tummy! Don't forget hearty winter greens are a great source of vitamin C and vitamin K (though not as good of a vitamin K source as animal products like raw butter).


slideshow

Follow RecipesDream

Lime Mint Sorbet (a Vitamix recipe)

I have had a blast playing around with my Vitamix since I got it last August.  I am always looking for new recipes and ways to utilize it's great features.  This sorbet is one of those sneaky ingredient recipes that tastes delicious and you'd never guess what's in it.  The beautiful green color comes, not from the lime, but from the spinach in this dessert!   This is a kid-friendly recipe and a great way to sneak some extra greens into your diet.  Also, this is dairy-free, so a great frozen treat for people (like me) who are lactose intolerant.  Enjoy~

Lime Mint Sorbet


Ingredients:

1/2 cup Welch's frozen grape juice concentrate (the one with the yellow lid and no added sugar), thawed
1/2 banana, peeled
1/2 cup fresh or frozen pineapple
1/2 to 1 cup fresh organic spinach leaves ( I use about 3/4 cup)
1 small slice of lime, including peel
1 mint leaf
3 cups ice

Put all ingredients into the blender in order listed. 


Blend on high for 45 seconds to 1 minute, pressing down with tamper to blend well.  When the machine sound changes and four mounds form, the sorbet is ready to serve.  Serve immediately.  
Follow RecipesDream

Green "Muffins" [Paleo][Low Carb]

Want a healthy Halloween appetizer, snack, or just a plain old hearty munchie? Try some ghoulishly green muffins (don't fret they're just spinach egg muffins).  I was trying to find a good Cindalou option for a Halloween party dish and Jon suggested that I just make some of my normal food- something gross looking and green goo-ish.  For once we agree ;)


I adapted this recipe from Steal This Meal Spinach Egg Muffins, though I have made similar in the past with coconut flour.  This time I added egg whites (since I had them) and used my Vitamix (since I'm lazy).  Steal this meal also has a nice kale recipe for those kale fans out there... that's me, of course.   They have a great Paleo recipe and lifestyle site so check it out.  No, I don't know them I just like their stuff.  Not everyday you can mash the superfood vitamin and mineral packed bags o' spinach and farm fresh free range eggs into a Paleo party bite.  Well, around here it is an everyday thing...  You can almost sing the alphabet in vitamins in this dish- give me a "A," "K," "MaGNESIUM."  Not to mention bioavilable B12, choline, selenium.  You get the idea.  Alas, onto green goodness:

Ingredients:

6 whole fresh eggs
1/4 c. dried egg whites (or 6 egg white equivalent or just more eggs) + water (see below)
3 cloves raw garlic
3 lbs. frozen spinach
1 T. lemon juice (optional)
sea salt and pepper, to taste (about 2 t.-1 T. each)
spices to taste: I used ~1 T. crushed red pepper, Italian seasoning, and 1 t. cayenne)
2 T. extra virgin olive oil
    Preparation
    Steam the 3 lbs frozen spinach with 1 T. water and 1 T. lemon juice (if desired) until vibrant green but soft and cooked (7-10 mins depending on temperature). Set aside and let cool. 

    Line muffin cups and spray with nonstick spray or coat with coconut oil (or real butter). Preheat oven to 350 degrees. 

    In the Vitamix (or your blender) add the powdered egg whites (I used 1/4 c. dry egg whites= 6 egg whites of the Deb El Just Whites brand) and water (1/2 c. then additional 1/4 c water to make smooth consistency) and blend on low until dissolved (1-2 minutes, varying speed). 


    Using a jam press or slotted spoon drain the spinach until very dry. I also used my flat fold colander to help squeeze out all the liquid, though hands work fine also. 

    Add the spinach to the egg white-water mixture in blender. Blend on medium for 1 minute to help mix. Add 6 raw eggs. Add garlic and spices (also pepper, 1 T. Italian seasoning and 1 T. crushed red pepper) and extra virgin olive oil. 


    Blend on medium mixing with Vitamix damper. When well mixed (2-3 minutes) turn to high and mix vigorously until well blended and bright green (my favorite!) Spoon into muffin cups and bake at 350 for 15-17 minutes or until toothpick comes out clean.


    Best toppings (as if they need 'em): raw organic almond butter or coconut oil (butter for ya'll dairy folks out there).  Actually a kalamata olive would go nicely too...

    Yield: About 22 medium "muffins" (I swae that count is before I ate half the batch!)
    I added this recipe to Nutrition Data for the stats and label: 


    Army of green goblin goodness... ahh yum!


    Cindalou's Kitchen Blues: Healthy Celiac / Coeliac Gluten and Dairy Free Recipes
    Follow RecipesDream

    Almond Joy "Ice cream" - Dairy Free and Sugar Free!

    This is a wonderful ice-cream substitute that is full of muscle building protein!   I created this recipe to satisfy my sweet tooth cravings.  I am in love with the results.  I used my Vitamix to make this "ice cream" in less than 5 minutes.  If you don't have a Vitamix, then half the recipe for the blender and you'll have a rich and delicious frozen protein shake.  A refreshing treat anytime.  Enjoy~

    Almond Joy "Ice Cream"


    Ingredients:
    1 cup So Delicious coconut milk, unsweetened (50 calorie version)
    1/2 cup chocolate protein powder (I use BSN Lean Dessert protein, but go with your favorite)
    1/3 cup Stevia in the raw, granulated
    3/4 tsp vanilla extract
    1/4 tsp almond extract
    1/3 cup unsweetened shredded coconut
    4 cups ice cubes
    *optional- slivered almonds for topping


    Directions:
    Place all ingredients into the Vitamix container in the order listed and secure lid.  Select variable 1.  Turn machine on and quickly increase speed to variable 10 and then to high.  Use tamper to press ingredients into the blades.  In about 30-60 seconds, the sound of the motor will change and four mounds should form.  Stop machine or melting will occur.  Enjoy immediately. 
    Follow RecipesDream

    Chocolate Ice Cream (Vitamix recipe)

    I am having so much fun playing with my new Vitamix!  This thing is a marvel machine...it makes soups, shakes, juices, smoothies, grinds up grains, chops and makes ice cream all in one (easy to clean) container.  Amazing.  My kids have been anxious for me to whip up some ice cream for them, so I tried out the chocolate ice cream recipe in the Vitamix cookbook.  It's delicious!  My kids equate it to a Wendy's frosty.  I like that I know exactly what's in it (no preservatives or artificial junk) and it's simple and tasty.  Better than it's store bought counterparts.  This recipe takes less than a few minutes to whip up. 

    Chocolate Ice Cream (a Vitamix recipe)


    1 cup whole milk (can use soy milk)
    1/2 cup rich chocolate Ovaltine (or Nestle quick powdered mix)
    1/2 cup Stevia in the Raw *see picture below
    1/2 cup non-fat dry milk (optional)
    1 tsp good quality vanilla extract
    4 cups ice cubes

    Place all ingredients into the Vitamix container, in order listed and secure lid.  Select Variable 1.  Turn machine on and quickly increase speed to Variable 10, then to High.  Use tamper to press ingredients into the blades.  In about 30-60 seconds, the sound of the motor will change and four mounds should form.  Stop machine.  Do not over mix or melting will occur.  Serve immediately.
    *Can half this recipe for a smaller portion.  This makes 5 cups.

    I love Stevia in the Raw for ice cream and smoothies.  It tastes great and is a clean eating sweetener.  I buy it in the bulk bag for measuring.

    Follow RecipesDream

    Speedy Hemp Seed Cucumber Dill Soup [Low Carb] [Vegan]


    3 large organic cucumbers, washed with skin
    3 cloves garlic
    1/4" ginger
    1 c. organic coconut milk*
    1 1/2 c. unsweetened original hemp milk
    ~2 T. extra virgin olive oil

    pinch dried spearmint leaves
    dash cayenne pepper (optional!)
    sea salt and pepper, to taste
    hefty pinch dried dill
    4 fresh basil leaves
    4-5 fresh mint leaves
    1 T. garlic powder

    1/4 c. shelled organic hemp seed (plus extra for topping)

    * you can use all hemp milk if you'd like. The coconut milk makes the ordinarily thin soup a bit thicker and more satisfying to me.

    Wash, dry, and cut a whole cucumber into thirds or quarters. Add the cucumber, ginger root, and garlic to your VitaMix or other blender. For about 30 seconds, blend on medium-hi (5) while using the damper (or a long-handled spoon out of reach of the running blades) to compress the cucumber. Once the larger chunks of cucumber are chopped, turn off the blender.

    Add in the hemp milk, coconut milk, olive oil and spices. Use your imagination for spices. I made this soup earlier in the summer when my mint plants were taking over the porch and begging to be used. Turn your blender to high and blend it for 1-2 minutes. I blend my soup until it is thoroughly mixed but there are still shreds of cucumber not pureed so it isn't just a single consistency. Serve cold, sprinkled with hemp seeds. This soup is quick and easy as a delicious, cooling appetizer or side soup.

    I used to adore the Hungarian Cucumber Soup I made every summer, but after finally saying adios to yogurt and dairy I've not made it since. A recent onslaught of cucumbers, mint, and dill sent me craving another batch of coconut yogurt for this recipe. I will still do that in the future, but for now I'm making (dairy laden) goat milk yogurt in our Crockpot for Jon. I have to appease the dairy guzzlers in the house occasionally :) I thought a good swap for this soup would be coconut milk, but after reading on and on about Karina's love for hemp milk I decided to use it as the base.

    I love hemp anyways and wanted another faucet of this amazing healthfood in my diet. This soup takes about 2-3 minutes in the Vitamix and is a nice cool, refreshing appetizer or meal. For even more protein toss in a scoop of hemp protein powder if you have it on hand. If not, no worries- hemp seed is nature's perfect little vegan package of balanced Omega3:6 healing fats, fiber (low carb!), and complete protein. All those Canadian's sure make a killing off our growing American demand for hemp!


    Cindalou's Kitchen Blues: Healthy Celiac / Coeliac Gluten and Dairy Free Recipes
    Follow RecipesDream

    Easy Tahini Dressing [Vegan]


    So much for a real recipe from Cindalou's here in the recent past, but since you're already primed for a whole host of non-recipes, I'll use this chance to combat my swamped-at-work-can't-post hysteria with a "recipe" for a healthy dressing or sauce. Of course everyone knows how to whip up (or at least purchase) tahini nowadays, so I'll bore you with more health benefits and history than an actual Tablespoon per tablespoon recipe :) Yes, I still cook. All the time. Cindalou's has taken a back seat to thank you notes, family visits, and our flourishing (and crowded) apartment garden. So how's that for yet another disclaimer/introduction? If you find my intro less than satisfactory, then I recommend Karina's new Strawberry Cobbler post. You'll smile (and lick the computer screen).

    Sesame seeds and tahini are quick and easy snacks and make a handy homemade dressing. The seeds themselves claim the honorable position of being one of the
    oldest condiments and their use seems to be traced back as far as 1600 BC. The seeds are a great source of many trace minerals and Omega 6 fatty acids. Indeed, the seeds were held in high esteem for the quality of the oil which is exceptionally resistant to rancidity and spoilage. One interesting fact: the phrase "Open sesame" stems from the sesame seed pod itself, which bursts open when it reaches maturity.


    Tahini dressing:
    1/4 c. raw, organic sesame seeds (I use unhulled since they're cheaper here and the hulls contain much of the calcium in the seeds) OR organic tahini (Once Again has a good organic tahini on the market)
    1-2 t. sea salt, more to taste
    1 t. or "dash" of San-J wheat free tamari (optional, omit for soy free)
    4 liberal T. organic extra virgin olive oil*
    squeeze lemon juice

    Combine the sesame seeds and the salt in the bottom of the Vitamix or your blender. You will probably want to use the dry blade attachment for the Vitamix if you have one. In my experience, the dry-blade purees the seeds better than the regular container. If you only have a normal blender, no worries, but you may need to puree the seeds in spurts (to prevent regular blender overheating) to get them all creamed up. If you 're using jarred tahini, just skip this step.

    It only takes about 1 -2 minutes for me to make this batch. I grind the seeds in 30 second intervals, but I take a minute to take the top off and scrape the sides of the blender to mix in the stubborn seeds. Once the seeds are pureed "dry," add the sea salt, olive oil, lemon juice, and tamari (if you're using the San-J). If you want to add a dash of turmeric (a great detoxifier and antioxidant), parsley (high in iron), or rosemary, add it now. Close the lid and blend once more until well mixed. Scrape the sides and pour into your dipping bowl or drizzle over your entree or salad, like below.

    I made my sauce here with a bit more olive oil and lemon juice than above in order to achieve a more fluid sauce to dress our grilled salmon and salad. Just adjust the olive oil to seed ratio to vary the consistency between a thick tahini chip/ raw veggie dip and a dressing (like we used it).

    * Add more olive oil to taste, I tend to add more olive oil to my share of the dressing since my body burns good fat efficiently (sugars and high carby foods kill my poor digestive system, so to each his own. Check your body type and eat what is fresh, local, and makes you feel best. Perhaps most importantly, trust your instincts... no, that doesn't mean reach for that bag of salted corn chips since you just like the taste!)


    Tahini Uses:
    • Tahini sauced mushrooms
    • Salad dressing (of course)

    Tahini Dressed Simple Spinach Salad

    Tahini Glazed Salmon
    • Stir fry dressing/sauce
    More Sesame Seed Uses:
    Sesame seeds are high in Omega 6 fatty acids which are healthy fats, but should not be over consumed since the average diet is already too high in Omega 6 fats compared to Omega 3's. Sesame seeds have a whopping (that sounds quantifiable and scientific doesn't it?) amount of copper, manganese, tryptophan, iron, and some B vitamins to name a few. They also pack a fair amount of fiber for such tiny little packages. The entire nutritional profile from World's Healthiest Foods shows the nutrient scale and there's also a great in depth article on the seeds.

    Be warned, however, that sesame seeds can be allergenic to some. Those of us with Celiac or gluten intolerance seem to garner the blessing of having multiple trigger foods (at least while the intestines are still healing). The other disclaimer for sesame seeds involves their oxalate content. Oxalates in the hull of the seed are generally bound in calcium oxalate and some doctors believe that they can aggravate kidney conditions, leading to kidney stones. The verdict is still out on this matter, since dietary intake of oxalates like those found in sesame seed hulls only amount to about 15% of the oxalate in calcium oxalate stones. The general wisdom among experts is, according to WHF,
    "that dietary restriction cannot significantly reduce risk of stone formation".
    In addition, oxalates are naturally present in a full spectrum of fruits and vegetables are normally present no issues with stone formation. Just to be on the safe side, buy the hulled sesame seeds or lightly colored jarred tahini since these varieties have the hull (and thus the calcium oxalate) removed. Of course when you remove the hull you lose nutrition, but a compromise can be struck if you are worried about kidney stones. More interesting stuff on oxalates is here at World's Healthiest Foods.

    A balance must be struck in diet just like everywhere in life, but natural and organic tahini is a great and far superior source of Omega 6's as compared with many popular vegetable oils touted for their "healthy mono and polyunsaturated fat content." The problem with many vegetable oils, as I've talked about from time to time, is that virtually all of them except commercial extra virgin olive oil are refined, bleached, or deodorized. These processes damage the unsaturated fat in the oil since the less saturated the oil, the more it is vulnerable to heat, light, and processing damage. So although you think or read the hype about soybean (a particularly poor oil choice), corn, canola, and even sunflower or safflower oils being "healthy," your oil is likely already rancid or damaged. Damaged oil wrecks havoc on our bodies as toxins, but no more about that here. I sound brooding and hell-bent on bringing down the vegetable oil market. If anyone's interested in more details about these fats and oils and the commercial propaganda surrounding them, please comment and let me know. I can expand on the subject and/or point you to fantastic references. It is always best to keep it simple. We use extra virgin olive oil (no heat - dressing and marinades only) and organic virgin coconut oil (for any heat or cooking) exclusively; you can't find another oil in our house except the fat stored in nuts :) This cuts down on buying multiple kinds of different oils and actually saves money and time at the store. It is my advice and practice. If you can do dairy and aren't quite thrilled about coconut oil, another good alternative is full-fat REAL butter, especially grass fed goat or cow butter. The saturated fats are what you need for heat and cooking since they are not destroyed by heat and light, (as opposed to margarine, vegetable (and olive) oils, and reduced or fat free products.) If only we could see our insides, then we'd all be a lot more picky about what we eat and how we prepare it. :)


    Cindalou's Kitchen Blues: Healthy Celiac / Coeliac Gluten and Dairy Free Recipes
    Follow RecipesDream

    Quick Coconut Potato Herb Soup [Vegan]

    Good news! This is my first official post-passing-the-prelim post. I have to admit, this is an old post which has been patiently waiting in the bin, so I do apologize for my .. lateness. The hard work paid off and I am now an official PhD candidate (still cheap grad labor, yesss!)... I guess those guys really want to know how 22Ne+p affects 23Na (must they salt their food often I wonder?). The coconut yogurt is still in the works, I promise! Sorry for all the delay and excuses; the gf/df probiotic we ordered is taking its sweet ole' time to ship here.

    Thanks for waiting patiently at your computer and Happy Saint Pat's Day!! I figured this green-looking (well, in these pictures at least) soup might add to the cheer since everyone claims that last bit of 1/1000000 drop of Irish heritage today. So drink up (the soup :) ) and honor good old St. Patrick.


    I know there are about a billion potato soup recipes out there, but I thought I'd add one more :) I am very pressed for time right now with work and, as I've said before, I am relying on my Vitamix to whip up quick healthy meals. I've done a different soup every night this past week and a half or so (they're all dairy free, and some low carb ones - not this potato one, of course). This is my healthy, dairy-free version of creamy potato soup. As you'll see in the recipe, I use red potatoes for a lower glycemic index than white potatoes. If you like potatoes or are as chilly as we are up here (where is spring darn it?!?) and want a different quick, healthy soup recipe(s), then see my links at the bottom. If you're on a low carb diet, substitute cauliflower for all of the potato and omit the water.

    2-3 small to medium red potatoes, with skin (most of the vitamins and fiber are in the skin)
    1/2 head fresh cauliflower OR 1/2 lb. frozen cauliflower
    1/2 onion
    4 T. shredded organic (no sulfur) coconut (divided- half for soup half for garnish)
    1 c. water
    1 c. low sodium vegetable broth (we use Pacific brand for gluten free vegan convenience broth)
    2 c. organic lite coconut milk
    2 T. extra virgin olive oil (more to taste)
    4 cloves garlic
    pinch ginger (ground)
    Sea salt and pepper
    hearty sprinkle dried dill weed
    sprig fresh rosemary

    Wash and dry potatoes and cauliflower. Chop the potatoes into halves or quarters and chop the cauliflower into half-fist sized chunks (no need to be exact, prechopping just reduces blending time). Add the potatoes and cauliflower to Vitamix (or your blender).

    Pour in the water, coconut milk, vegetable broth, olive oil, and add the spices. I just dropped whole garlic cloves and the chunk of ginger directly into the blender. You can adjust the water to coconut (or other "milk") amounts to suit your taste. More coconut milk will make a creamier soup, of course, so use whichever ratio you prefer. Toss in half of the coconut and secure your blender lid.

    Turn on the blender at low variable speed to roughly chop the potatoes and cauliflower in the bottom. Once these have been reduced in size a bit, blend on HIGH for 6-7 minutes or until mixture is steaming. Serve hot with some nice, steamed collard greens like my Easy Cranberry Greens with Kale and Collards and some Irish soda bread (see links below) or my Honey Potato Flatbread. Again, if you're a low carber then sub all cauliflower for potatoes and enjoy!


    Other gluten free delicious potato soups:

    Cindalou's Kitchen Blues: Healthy Celiac / Coeliac Gluten and Dairy Free Recipes
    Follow RecipesDream

    Quick'n Tangy Broccoli Soup [Vegan] [Low Carb] [Low Fat]


    1 lb. fresh broccoli (try to get stalks with as much floret head as possible. Less stem is better!)
    2 c. low sodium organic vegetable broth (Pacific brand is gluten, dairy free, and vegan)
    1 to 1 1/2 c. organic lite coconut milk
    1 c. water
    1/4" chunk fresh ginger root
    7 cloves fresh garlic
    5 t. nutritional yeast
    2 T. extra virgin olive oil

    Seasonings:
    turmeric
    freshly ground cumin
    rosemary, to taste
    sea salt and pepper
    1/2 fresh lime, peeled

    Optional:
    2 T. organic hemp protein powder

    Once all of your ingredients are in order, start by washing your fresh broccoli and chopping off a few of the florets to reserve for later. I used these florets at the end for garnish and texture.

    Fill your Vita-Mix (or other blender) with the vegetable broth, coconut milk, water, garlic cloves, jalapeƱo, olive oil and seasonings. The beauty of easy blender soups like this is that you can just throw the veggies in whole; no chopping required. This is a time saver we can all appreciate. I put the garlic and pepper on the bottom of the blender and then pour over the liquids and add the seasonings. Add all the broccoli with the exception of the reserved garnish florets (do this depending on the strength of your blender if it can handle everything at once).


    Cover the Vita-Mix and turn from low (1) quickly up to variable speed 10. After a moment, you can turn it all the way up to HIGH and blend for 6-8 minutes or until the soup is hot and steamy. If your blender is not powerful enough to heat the soup without itself overheating, puree the broccoli and soup ingredients in your blender and then warm the soup on low over the stovetop or in your microwave. This second method will take longer than the quick Vitamix method since the Vitamix is built to handle high heat and soup making (it is more of a power hog than your typical blender, however).

    Once the soup is steaming, spoon in the nutritional yeast and then pour into serving bowl and drop in your reserved florets. You don't want to add the nutritional yeast until the very end since the hotter blending process can damage the B vitamins. Once completely blended, the steaming soup should not be too hot to add the nutritional yeast. This allows you to retain more of the active B vitamins while still getting that tangy, pungent flavor which the yeast imparts to the soup.

    Nutritional yeast is a fantastic gluten free supplement which is easy to use and very flavorful. It is popular with many vegans as a potent source of many other B vitamins and vitamin B12 (if fortified with B12). The flakes are great for making dairy free cheese and cheese sauecsthat dissolve quickly. Nutritional yeast is gluten, dairy, and candida yeast free. It is a great and inexpensive supplement for everyone, but especially gluten free types who can't have brewers yeast.

    For an optional protein and Omega fatty acid boost, stir in hemp protein powder at any time during preparation. If you are curious about hemp, read more about the benefits of hemp. Serve hot and enjoy.

    Makes ~7 cups


    Other uses for nutritional yeast:
    The Cheesy Uncheese Sauce @ Karina's Kitchen (Gluten Free Goddess)

    Cindalou's Kitchen Blues: Healthy Celiac / Coeliac Gluten and Dairy Free Recipes
    Follow RecipesDream

    Quick Beet Potato Puree [Vegan]


    1 lb. fresh raw beets OR 1 15 oz. can salt-free organic beets
    3 small red potatoes
    3 cloves fresh garlic
    2 T. extra virgin olive oil
    1/4 c. black olives

    Seasonings:
    rosemary (dried)
    sea salt and pepper
    turmeric
    dried parsley

    This is yet another delicious, quick, and healthy vegan side dish courtesy of the Vitamix (or your blender/food processor). This whole meal takes about 2 minutes from start to finish if you have the potatoes already cooked.

    Wash off potatoes, cook if necessary. I had precooked potatoes on hand for ease of use when I come home late from work (like today). You can always resort to the quick paper towel-microwave method for cooking the potatoes, if absolutely necessary, but I recommend roasting a few on the weekend for later weekday consumption.

    The actual "instructions" are a breeze: place the garlic, small potatoes (or halved medium cooked potatoes), raw washed beets, olive oil, and seasonings in the Vita-Mix. Turn from low (speed 1) to variable high (8-10) for approximately 1-1 1/2 minutes to blend while pushing the chunks to the bottom of the Vitamix with the damper. That's it! Blend to the consistency of your choice; I did a puree here which lends itself nicely for a topping for the rotisserie lamb we had tonight as a late celebration for Valentine's day. Garnish with parsley and enjoy either cold or warm. If you like it cold, it is better to eat beets this way in their raw form to retain folate and flavonoid content.


    Beets are a fantastic wintertime root vegetable packed with nutrients (as if the bright, intoxicating red color didn't signal that already!). The beautiful reddish-purple color of beets and their juice comes from pigment betacyanin which has an impressive number of health benefits. The beet pigment contains flavonoids called anthycyanins which seems to be responsible for much of the health-promoting effects of beets. World's Healthiest Foods gives a great summary on the health benefits of beets, but I'll summarize a few pointers:
    • Beets are high in folate and manganese. Folate is an essential B vitamin of which many women and the elderly rarely consume sufficient amounts. Deficiency of folate can lead to birth defects in newborns and neuromuscular degeneration, to name a few conditions.
    • They help protect against cancer, particularly colon cancer by encourgaing secretion of CD8 immune cells in the colon which help identify pre-cancerous cells.
    • They help protect against heart disease by lowering cholesterol (while raising HDL) and lowering triglycerides.
    • Help protect against birth defects (due to high folate content)
    Of course, beets are not low glycemic index so take care to enjoy them in moderation while they are in season and fresh. The high sugar content of beets is what make them a traditional natural source of unrefined sugar. The sugar content is not outrageous, so beets can be safely consumed by diabetics in very small quantities and on rare occasion. Remember that adding a splash of extra olive oil to the beets will help lower the glycemic impact of the dish since high quality "good" monounsaturated olive oil fat lowers the insulin response in the body.

    Again, try your fresh beets either raw in a salad or a puree, or only lightly steamed (save the juice, it contains much of the lost folate and Vitamin C!). The beneficial flavonoids and water soluble vitamins are lost in cooking and under heat. Folate is especially vulnerable to cooking. A disclaimer for anyone with kidney problems: the naturally occurring oxalates in beets can aggravate an oxalate imbalance in the body. Kidney and gallbladder problems allow high abnormal concentrations of oxalates to build up and crystallize, whereas a healthy body could process the oxalates found not only in beets, but also in many other veggies as well as in own own bodies.


    Cindalou's Kitchen Blues: Healthy Celiac / Coeliac Gluten and Dairy Free Recipes
    Follow RecipesDream